Ad unit 1

Showing posts with label Apoxie Sculpt. Show all posts

Sunday, March 22, 2015

Attack on Titan / My Little Pony mash-up!


This is one of my favorite custom My Little Pony creations thus far. For anyone who hasn’t seen  Attack on Titan, it is a Japanese anime (based on a manga) in which the human race has taken refuge within enormous walls, built to protect themselves from enormous man-eating giants (the titular titans.) I enjoyed the first season of the anime, but don’t recommend it for anyone under the age of at least 12, as it is rather violent and gorey.

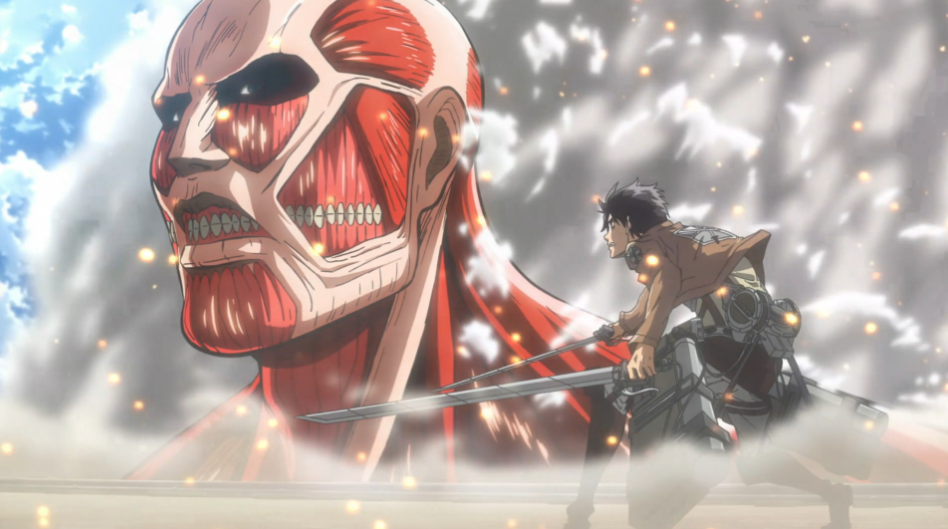
This pony was inspired by one of the more frightening encounters in the series during which our hero Eren Yeager attacks the biggest titan to ever be encountered, the “Colossal Titan.”

Image credit http://operationrainfall.com/wp-content/uploads/2013/05/Attack-on-Titan-Eren-and-Colossal-Titan.png
As you can see, the Colossal Titan is a huge and imposing 
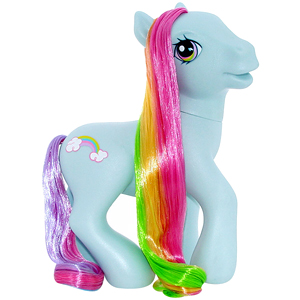
monster! To recreate this character in pony form, I chose one of the Generation 3 “Styling Size” ponies, specifically Rainbow Dash. This is what she would have looked like out of the box:

The pony I used looked no where near as nice as this one. Mine was a frizzy-haired, stained mess! The G3 styling size ponies are a nice, heavy toy that stands up well to any customizing (and play) and is easy to work with. For the Eren figure, I wanted something proportionately smaller, so I went with a Friendship is Magic My Little Pony blind-bag “Apple Jack” figure.

image credit http://i.ebayimg.com/00/s/NjkyWDkyMg==/z/~7sAAOSwq7JT1IrS/$_35.JPG

The Colossal pony’s features were sculpted with Apoxie Sculpt, as it cured to a rock hard material without baking. Lots of people bake custom ponies sculpted with Sculpey, but this never seemed like a good idea to me, and Sculpey is too fragile to stand up to the flex of a vinyl figure beneath it.
Eren’s 3D maneuvering devices were also made of Apoxie Sculpt and I used flattened aluminum wire for his sword blades.
A close up of Eren's gear

Both figures were painted with acrylic paint, and Eren is suspended by vinyl coated copper wire that was drilled and epoxy glued into his back, then fed down into the Colossal’s front leg through a hole in its back.
There is a tiny blood-splash where the wire / spear pierces the titan's shoulder


This pony is for sale, but I do love the attention that it brings to our table at shows! It is a great conversation starter. So many people think it is just a skinned pony (eww!) until we start talking about it. Here are some more pics:


And here is the Colossal pony enjoying his debut at the 2014 Boston Comic Con!

Even this huge crowd couldn't intimidate this titan! ROAR!
Any suggestions for my next giant-sized custom pony? I have about 4 more of the large styling sized ponies laying around! 

Monday, March 16, 2015

Custom My Little Ponies: How-to, progress pictures!

These two ponies I'll share are not actually new. What makes them interesting is that I actually took some pictures of my work as I went! This isn't really a how-to, but it will give you an idea of some of the steps I took in completing these projects.

The first one I'll share is my Purgatori custom from 2008. Here she is again, finished:

Lovely little thing, she is


And here are some progress shots. You'll see that I was mainly focusing on the wings and how I put them together. They are basically a wire mesh glued to thin aluminium wire, which was fed through holes in the shoulders and down into each leg. So the weight of the wings is supported all the way down into the feet.


Here you can really see the sculpting and the nice way that Apoxie Sculpt blends into the vinyl of the pony. Note the wire at the base of the wing.


 You can also see that I haven't added the hair yet- that is always the last thing to do: rehairing. No fangs yet either.


In this last shot you can see how I have filled in the wing membrane and started to add the "finger" bones to each wing. The fingers are sculpted onto both the front and the back. 

And voila! Isn't she lovely? 

Nest up is a restoration and customization of a really sad looking G1 Twilight Sparkle. This was for a contest at the MLP Area. First up, lets take a look at this sad girl. Reports are that the family dog used her for a chew toy. 


Ouch! That doesn't look too good. Twilight Sparkle was a So-Soft flocked pony, so the first step was to remove the flocking, which was easily wiped away with acetone. This removed the paint as well. 


Her head didn't look too good, either. I cut all of her hair off then used pliers to pull the plugs out from the inside. 

First thing this girl needed was some ears, I used Apoxie Sculpt to form a new ear tip for her left ear and to fill in the hole and build an ear on the left. The damage was close to her eye, so the brow had to be rebuilt as well. She also had a little nick on her upper lip. 


In the background you can see a bottle of mint hand lotion. Hand lotion (any scent) is great for keeping Apoxie from sticking to your skin. 

After her head was repaired, I rebuilt her missing leg and her dinged back foot. The blue tape and spool are to help her keep her rearing pose while the Apoxie cured. 


That's it for the progress pictures, unfortunately. Since I wanted to keep the rearing pose I decided to give her a long flowing skirt. She was completely sculpted with Apoxie Sculpt and re-haired with Nylon hair. 


As you can see, the repairs blended seamlessly with the original body. Overall, I was very pleased with this piece.